Step 1
Place washer blank on stamping block. Adhere a medium circle stamp guide towards the top of the blank. Use the guidelines to evenly space out letters and align stamp impressions on a curve.
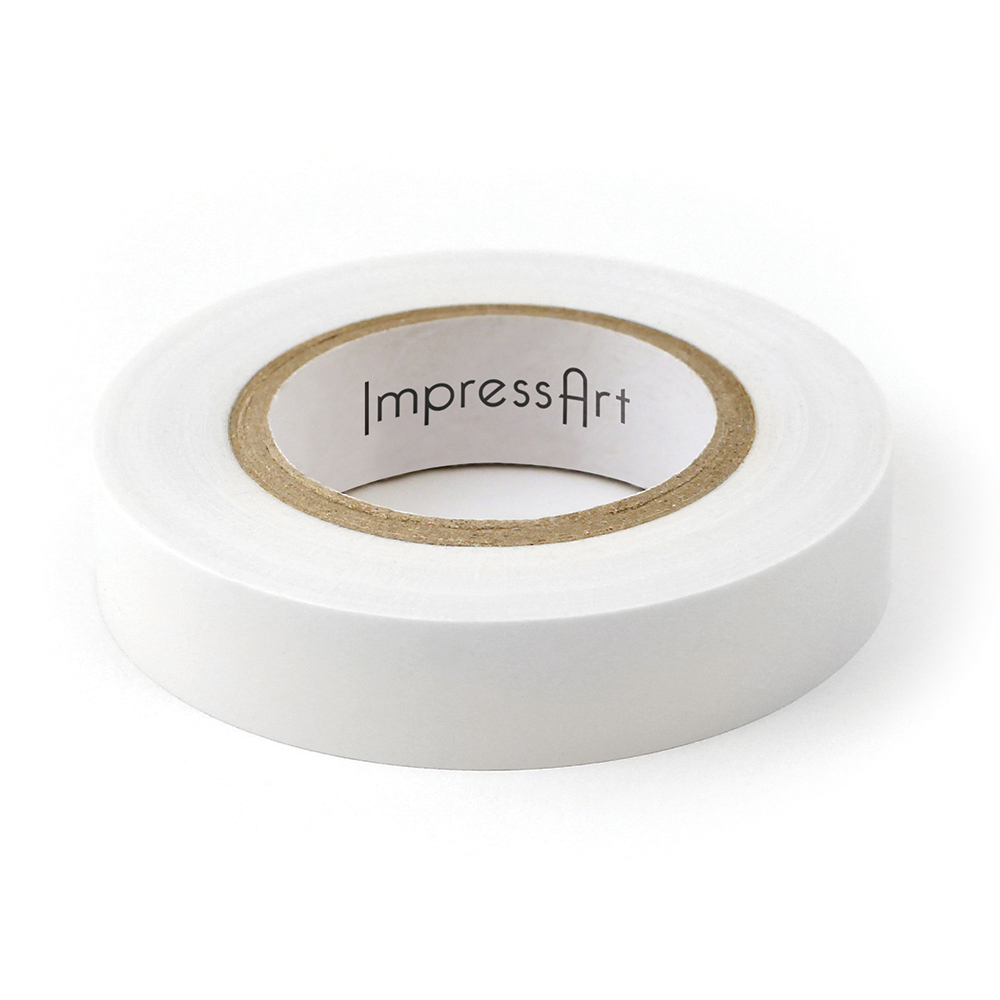
TIP: Use stamp tape to secure the blank to the stamping block so it doesn't move while stamping.
TIP: Write desired message directly onto the stamp guide and utilize the guideline marks for spacing.
Step 2
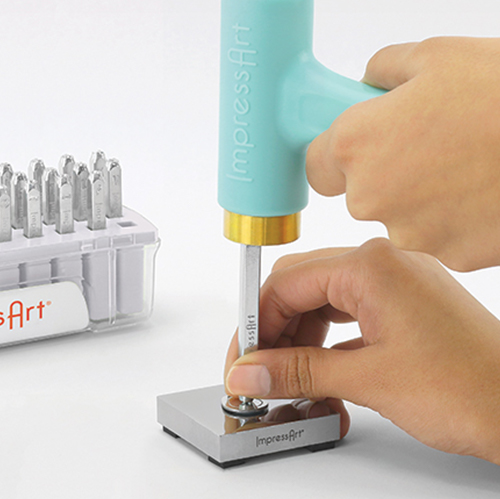
Place stamp on blank, in line with the corresponding mark on the stamp guide. Lightly drag stamp towards the guide until the stamp catches the edge of the guide. Hold stamp flat and firmly in place before striking with medium force using Metal Stamping Hammer. Repeat to complete the desired word, turning the stamping block while working to ensure that the stamp is facing the correct direction. Remove stamp guide.
TIP: If the stamp has an ImpressArt logo, make sure it is facing you so that the impression is stamped in the correct direction.
TIP: Slightly tilt the stamp towards the guide while dragging the stamp. Make sure you hold the stamp flat and firmly in place before striking the stamp.
Step 3
Place circle blank on stamping block. Stamp a texture pattern using the Straight Line 19.5mm Metal Stamp and the crystal setter.
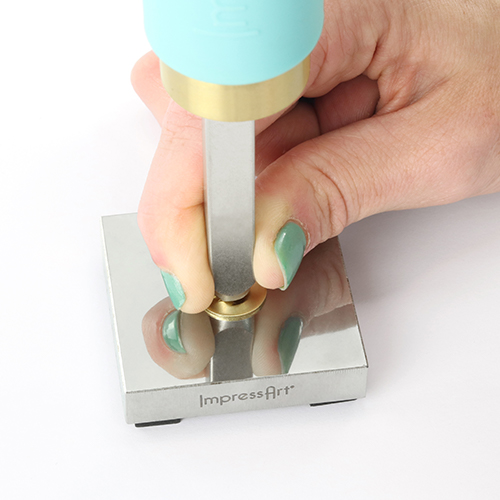
Stamp desired design details with the crystal setter. Hold crystal setter flat and firmly in place on the stamping blank. Strike with medium force using metal stamping hammer until a round indentation is formed in the stamping blank.
Position Straight Line 19.5mm Metal Stamp with the line facing the desired direction of the impression. Place stamp on blank. Hold stamp flat and firmly in place by applying pressure to the stamp and anchoring the side of your hand on workspace.
Use a modified version of the Tap & Tilt technique to stamp the 19.5mm Straight Line Stamp. While applying pressure to the stamp, strike once with medium to hard force. Then continue to strike while very slightly tilting the stamp side to side to achieve the entire length of the line. Repeat technique to complete texture pattern
TIP: Place stamping block (with no rubber feet or padding) on a hard sturdy surface when stamping aluminum, brass, or copper with Curved or Line Metal Stamp.
Step 4
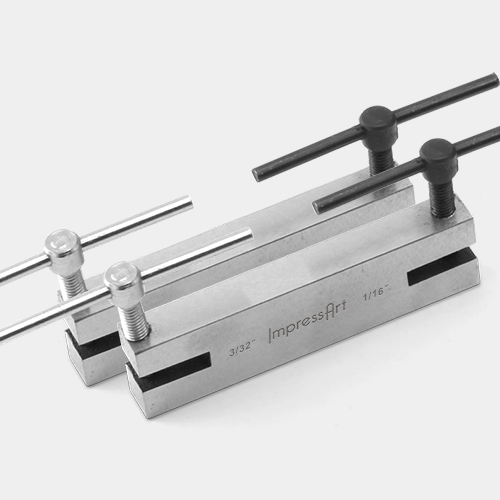
Pierce a hole at the top of each blank using the 1/16” punch of the 2 Hole Screw Down Punch. Simply turn the handle of the screw down punch until the punch pierces through the stamping blank. Twist the handle of the screw down punch in the opposite direction to raise the punch and remove blank.
TIP: Make sure not to screw the punch down too much as this will mar the surface of the blank and leave an unwanted impression of the base of the screw.
Step 5
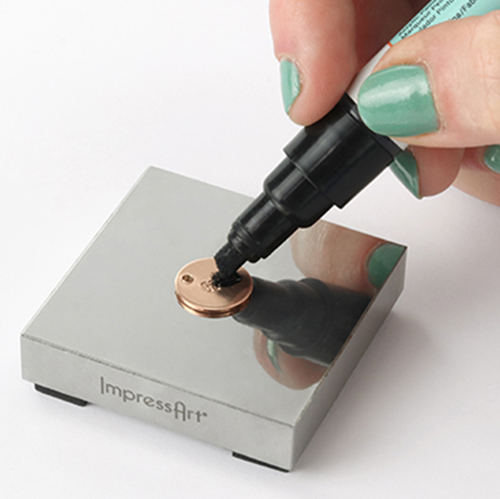
Highlight desired impressions with Stamp Enamel. Wait 3-5 minutes and then wipe away the excess enamel from the surface of the blanks.
Step 6
Dap both blanks with opposite curvatures to create a locket shape. Place circle blank, stamped side up, inside dapping cavity of dapping block. Hold punch in center of blank and tap the punch with the Metal Stamping Hammer until blank is evenly domed into a concave shape (back of the locket). Repeat dapping technique on washer blank, making sure this time that the stamped side is facing down, inside the dapping cavity. Continue to dap until washer is evenly domed into a convex shape (front of the locket).
Step 7
Use the fine and super fine grit on the High Polish Finishing Block to clean and buff metal to a high shine. Or use the medium grit on the Matte Finish Buffing Block to create a brushed matte surface.
Note: High Polish Finish Blocks & Matte Finish Buffing blocks can be used on all ImpressArt blanks excluding ImpressArt Artisan collection plated blanks.
Step 8
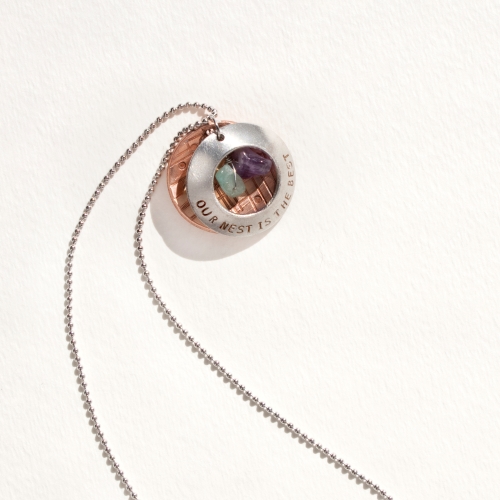
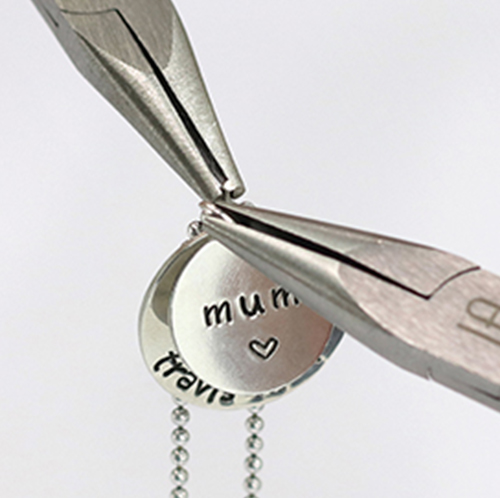
Use the tips of two chain nose pliers to grasp the sides of a jump ring, with the opening of the jump ring facing up between the two pliers. Laterally twist each side of the jump ring in opposite directions to open the ring. Slide dapped circle blank onto jump ring, followed by desired number of semi-precious charms, and the dapped washer blank, making sure that the stamped sides of the blanks are facing the same direction. Then drape ball chain over the opened ring. Laterally twist the jump ring back with tension to close.
NOTE: Do NOT pull outwards on the jump ring as it will weaken the metal and distort the circular shape of the ring.
Step 9
Close clasp to complete the necklace.